Inverter installation
2019 Grand Design Reflection 303 RLS 5th Wheel
2000 watt Pure sine wave inverter. Magnum Ind. model MS2012 CB-20 + 100 amp charger.
For this project, I installed two sub panels. The 1st is at the incoming electrical service entrance, located above my hot water heater and about 12" from the wall. This panel is really just a tie in point to intercept one leg of 110 volt in the four wire harness. I connected all service wire in the panel at this point and ran one leg of 110v through a 50 amp breaker. This conductor is energized whether your using 50 amp or 30 amp service. This electric feed goes to the Magnum inverter using # 6 awg wire, the same as your entrance service wire. I used the red hot wire and cut the black unused leg of this wire bundle. The rest of your four wire service goes right through to your main service distribution panel. The inverter has two 20 amp breaker circuits built into it. I ran two runs of 10 gauge wire to another sub panel and fed the two hot inputs with each of these wire runs. The sub panel has 2 slim line double 15 amp breakers. Two 15 amp breakers are fed from one 20 amp feed, the other two from the other 20 amp feed. These are the breakers that are used to replace the circuits on the main panel that are removed. I removed each 14/2 awg circuit wire from the main panel and pulled it out the back of the main panel. I spliced into this wire - circuit (wire nuts - electrical tape wrapped), and have a new extension going to the sub panel. I did four different circuits. The inverter has an automatic pass through and transfer switch when connected to shore power. It's 110 v input routes power to the sub panel and out to the respective circuits. When boondocking the inverter routes converted AC to just those four circuits. This seemed the best way to do this as I understand that the main panel is not rated for another 50 amp breaker.
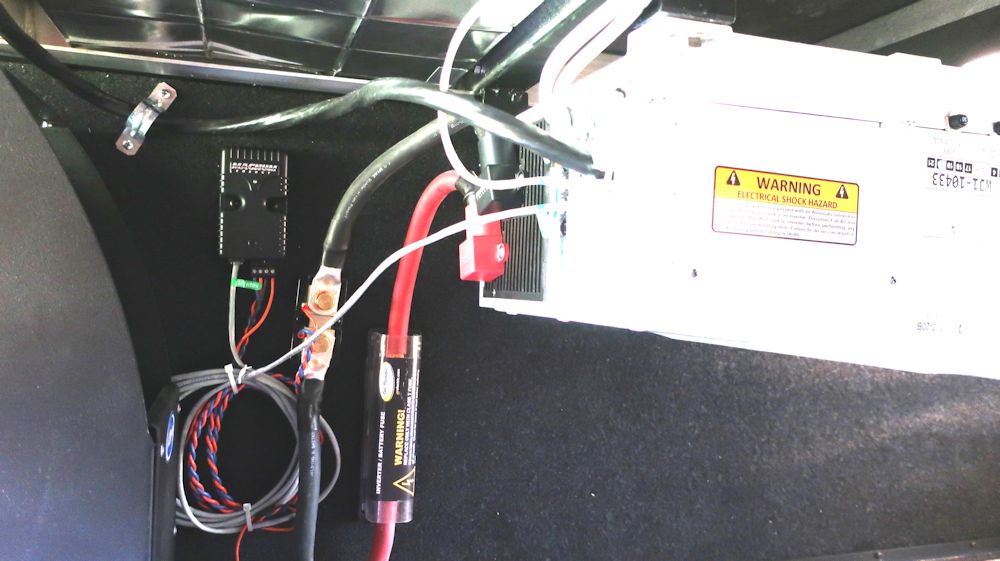
I installed my Magnum inverter by hanging from the Aluminum floor joists in the storage bay, or "basement" area of the 5th wheel. It is right next to the furnace vent duct that runs between two floor joists, that leave enough room on both sides of the ducting to make the AC wire runs and keep them recessed and out of the way. A DC shunt and positive side 250 amp slow blow fuse is pictured here, as well as the ME-BMK battery monitor system.
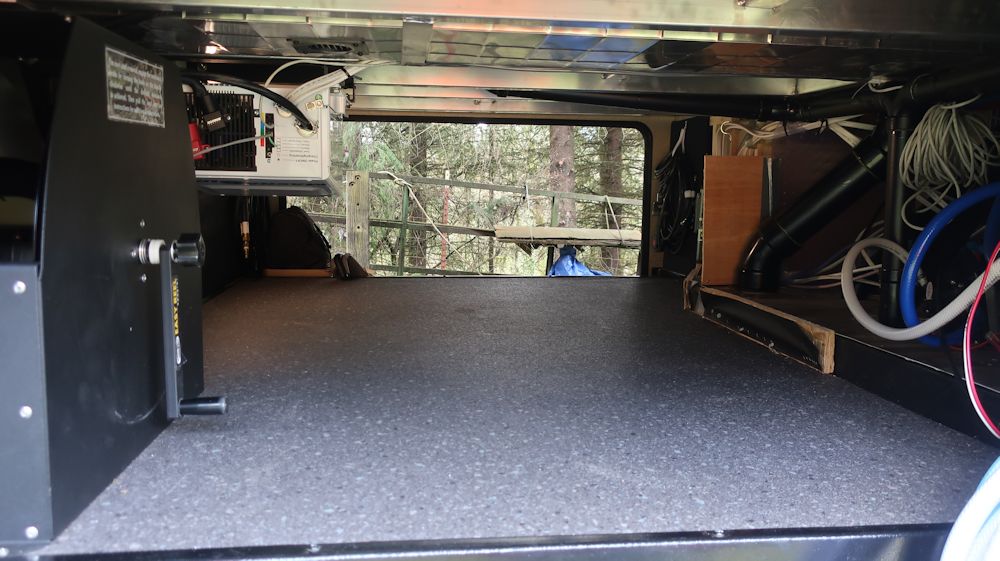
View through the storage bay. All wiring to the coach and sub panel is tucked away next to the furnace ducting. Sub panel with four rewired circuits is to the right near the far door. The trim wall covers up all the utilities.
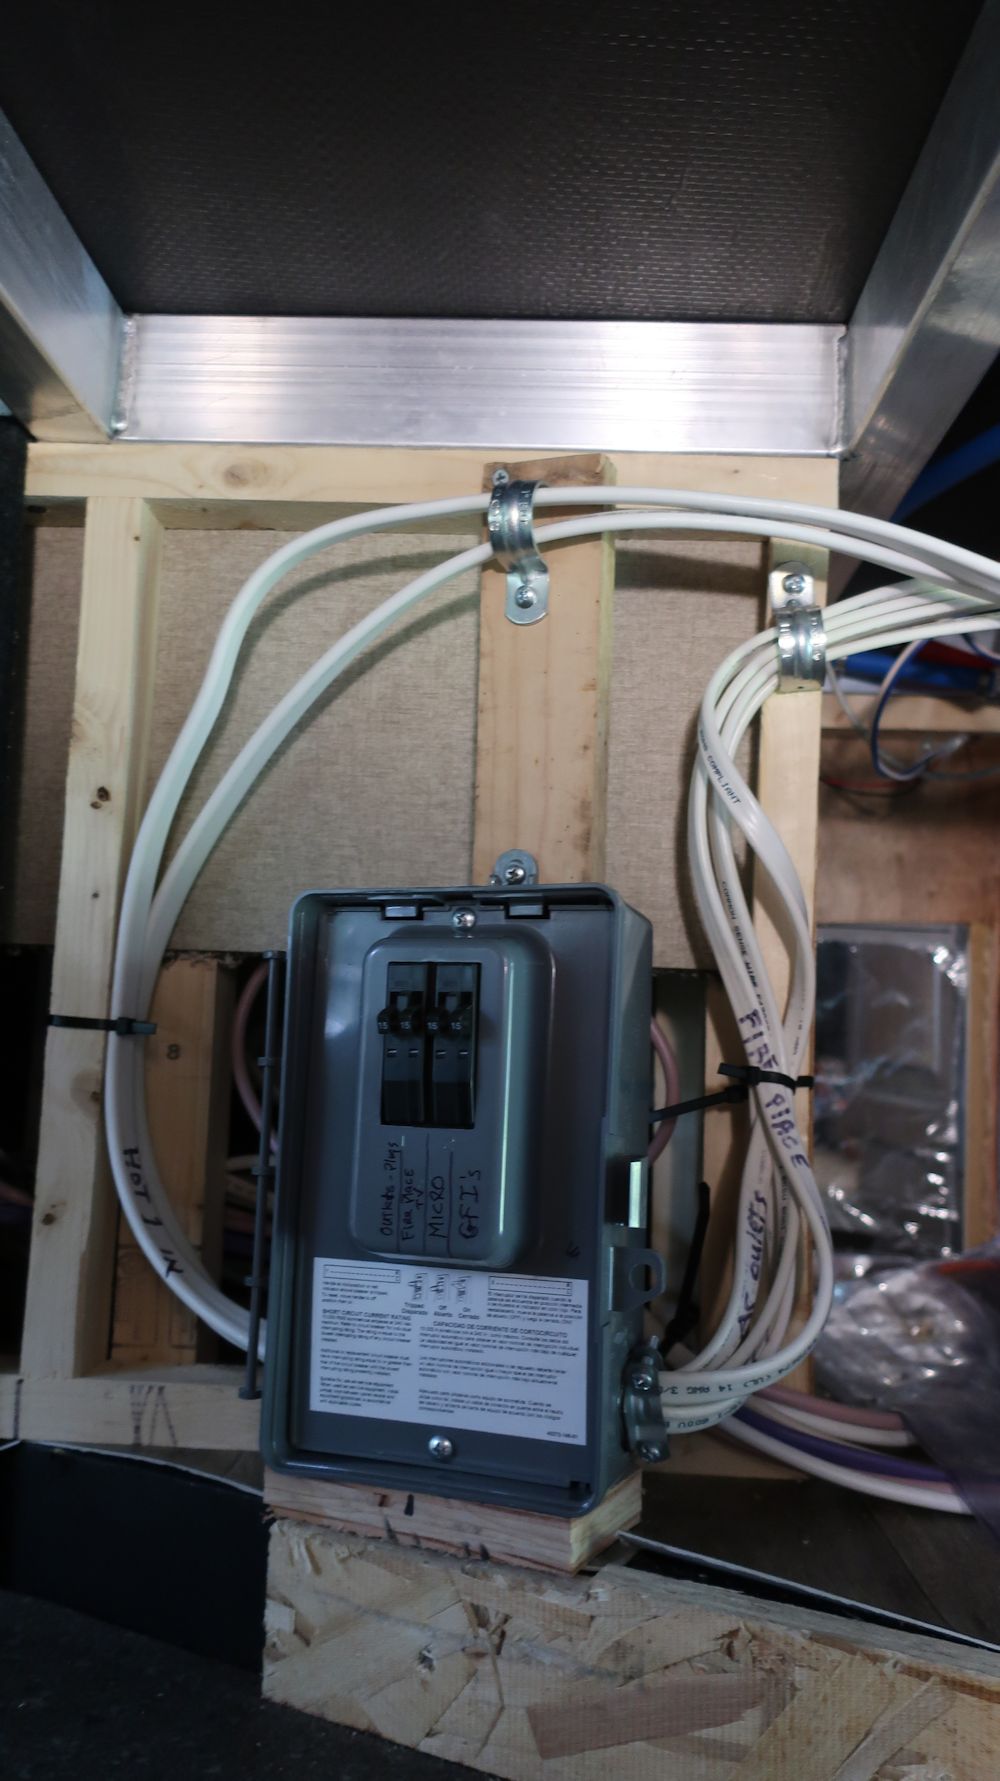
Sub panel. Used QO 60 amp 2 space 4 circuit panel. Bought at Home Depot These plastic boxes are commonly used for outdoor Hot Tub installation. They are very compact and perfect for this project. Two Slim line double 15 amp breakers fit perfectly. When the trim wall is put back up, there is a cutout to access the breaker switches.
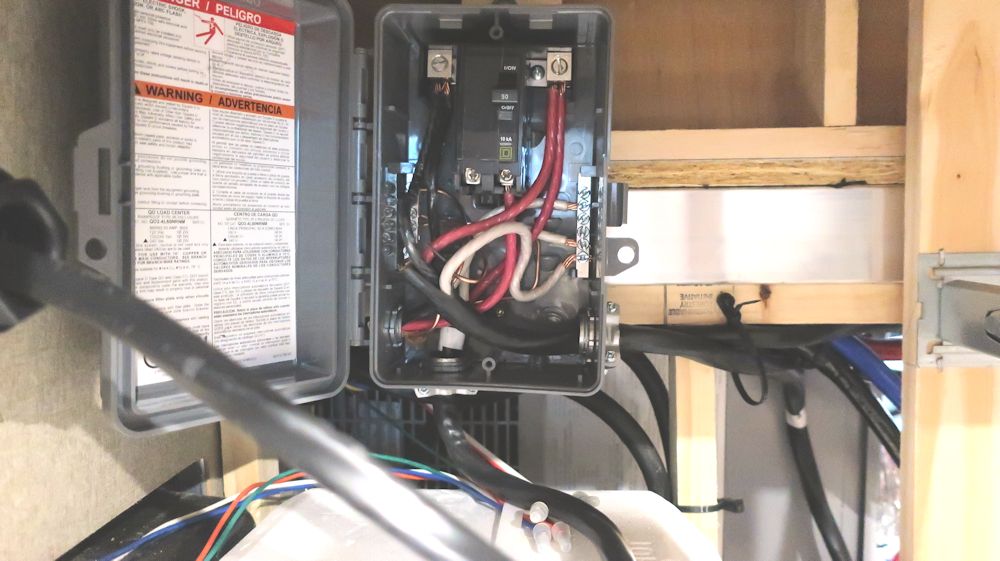
Service entrance wiring. Another QO box was used as a tie-in point to run my branch circuit of 110v power feed to the inverter-charger. The incoming #6 AGW wire was cut and wired to the the two main terminal screws in the box as shown. There is also a ground bus and neutral bus for that wiring as well. I used just one side of the box for a 50 amp breaker to make my feeder wire run to the inverter. I replaced the wiring to the outdoor shore power plug as it was not quite long enough to do all this after cutting the wire to do this. All wire used here is #6AGW The location of this panel is in a service door of the hutch, cabinet inside the coach. Very handy access. The hot water heater is right below. Doing this avoids trying to use the main power distribution panel and the problems that go with that idea.
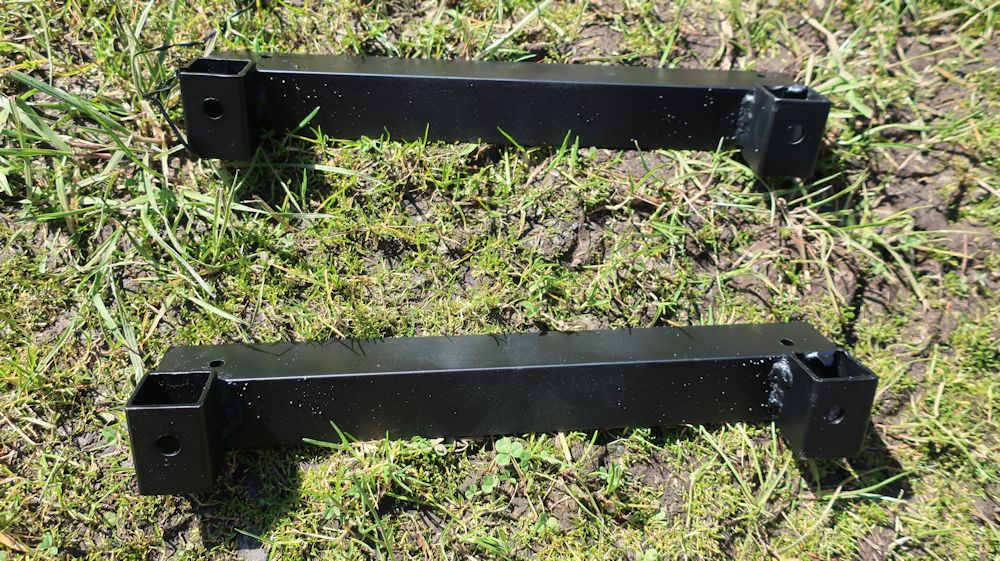
Brackets were made and welded together in order to hang the inverter from the roof of the basement. Angle iron and pieces of 1 1/2" square stock. Square stock has holes drilled to attach nylock nuts inside. Angle iron drilled along with the floor joists to bolt through.
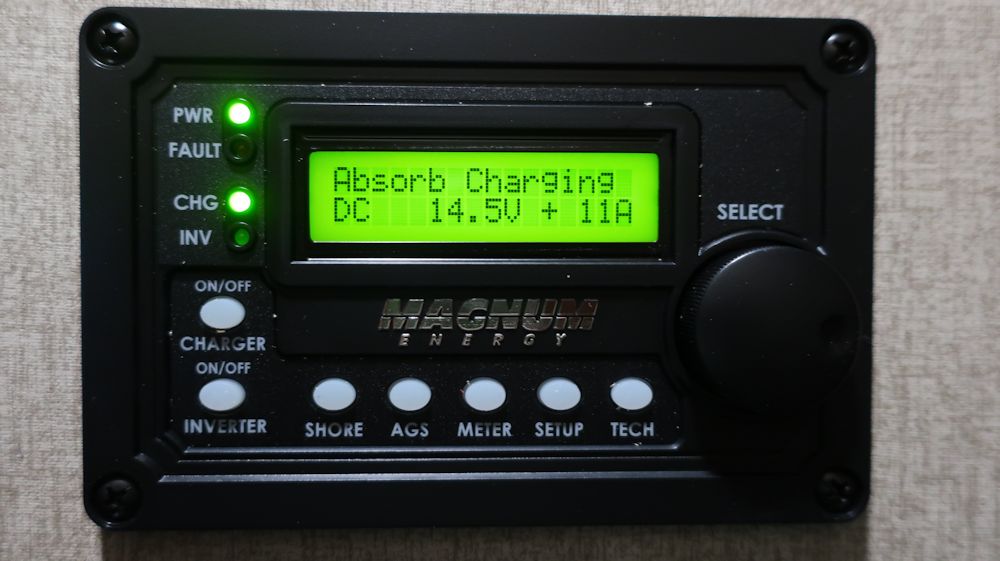
The ME-RC50 remote for the Magnum inverter is a really must have. I was able to fish my remote cord up into the wall space from down in the basement, to the mounting location in the RV just above the furnace control. Right at eye level in the hallway next to the bathroom door.
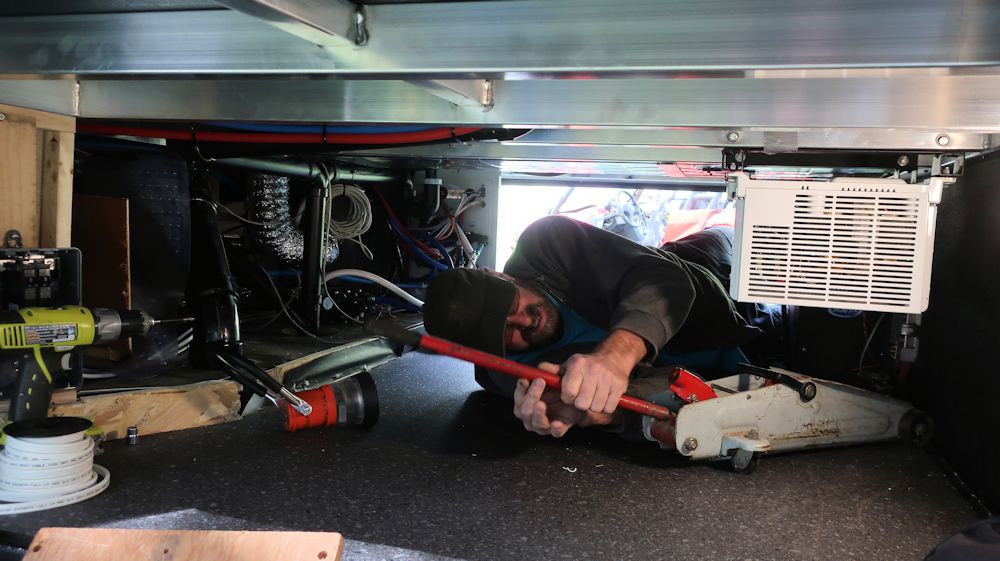
This thing is heavy! 40 + lbs. A floor jack is very nice for raising this up for attachment to the brackets.
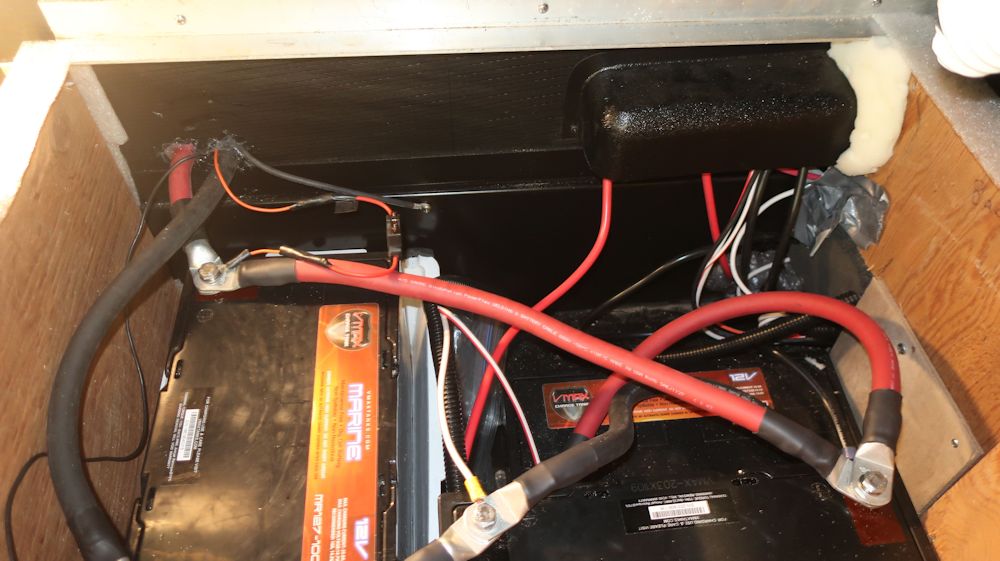
Battery Bank is three V-max 100 AH AGM deep cycles. All battery cable was upgraded to 4/0 cable from posts to inverter. Solar power input is also included in the battery wiring.
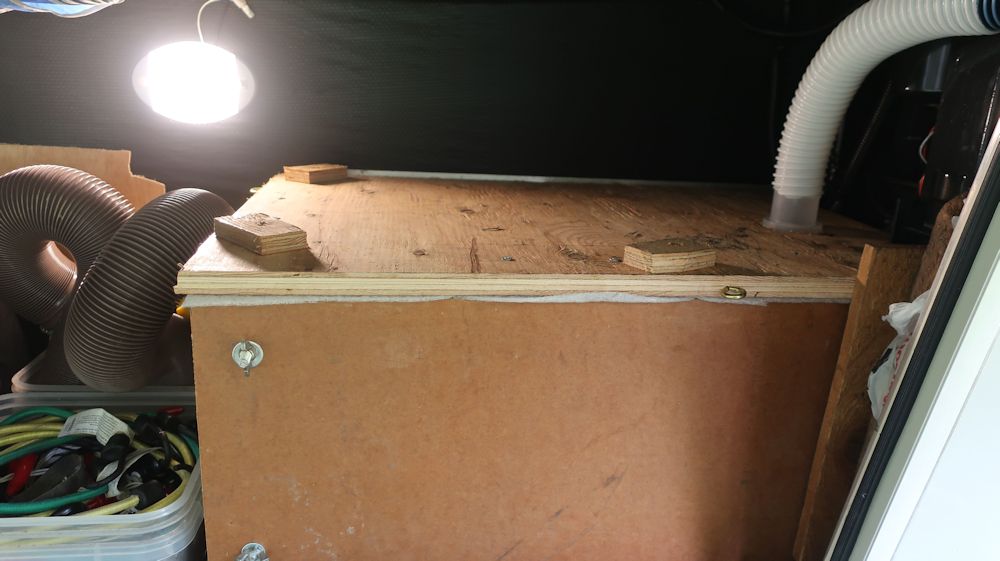
I decided to build a battery box with one common vent. This thing opens up well. The top comes off and the front wall unbolts when the need for service occurs. The funny thing about this project is that I found more room in this forward compartment where the landing gear is. I am able to put a propane fire-ring on top of the box, a coleman lantern, tarp, extension cords, Christmas light sets for the holiday, extra sewer waste hose caps and small things that need to be stowed. Also, it turns out that my extra waste hose that you see to the left here, fits just fine in the box with the batteries.
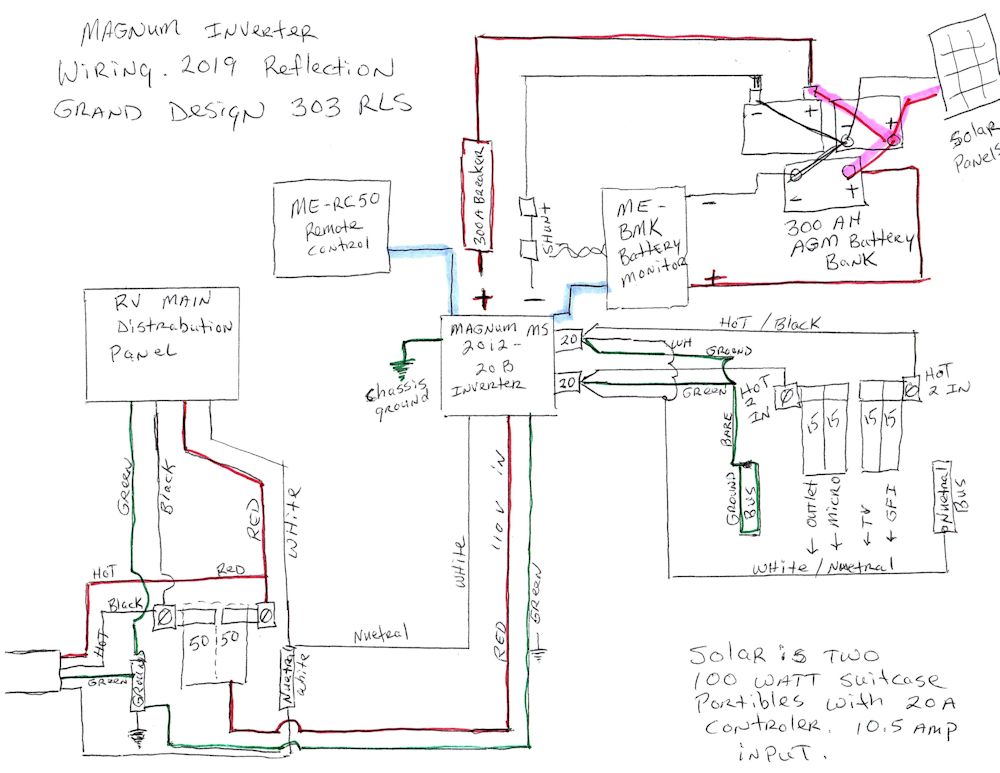
Overall wiring diagram of the project.
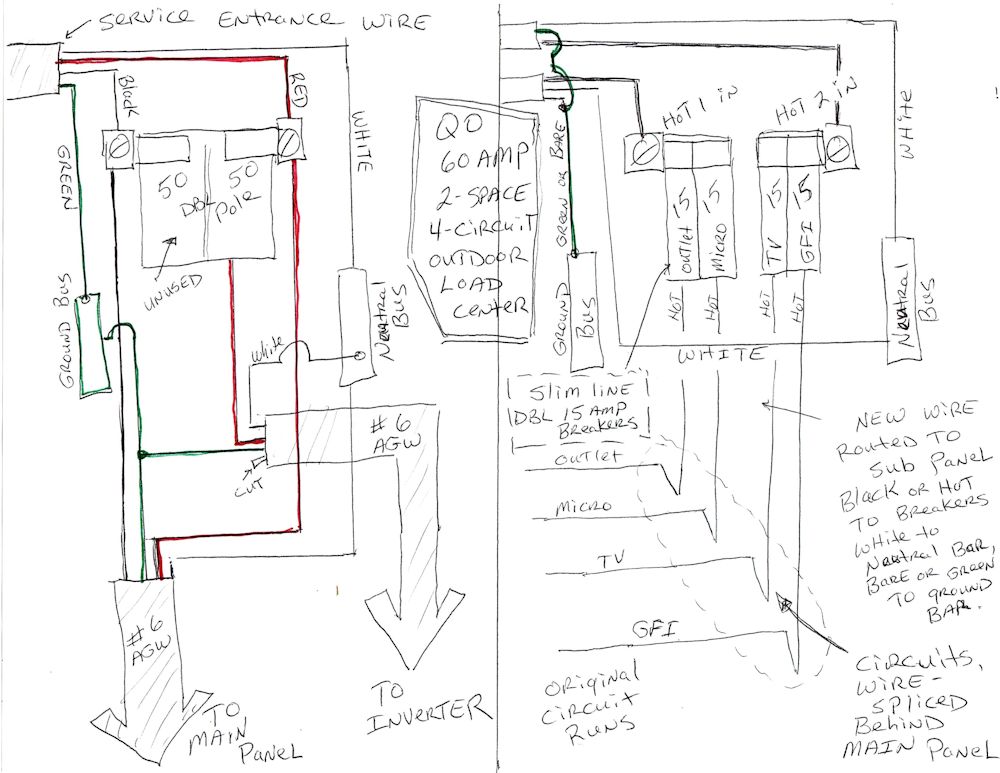
Sub Panel and incoming service junction panel wiring.
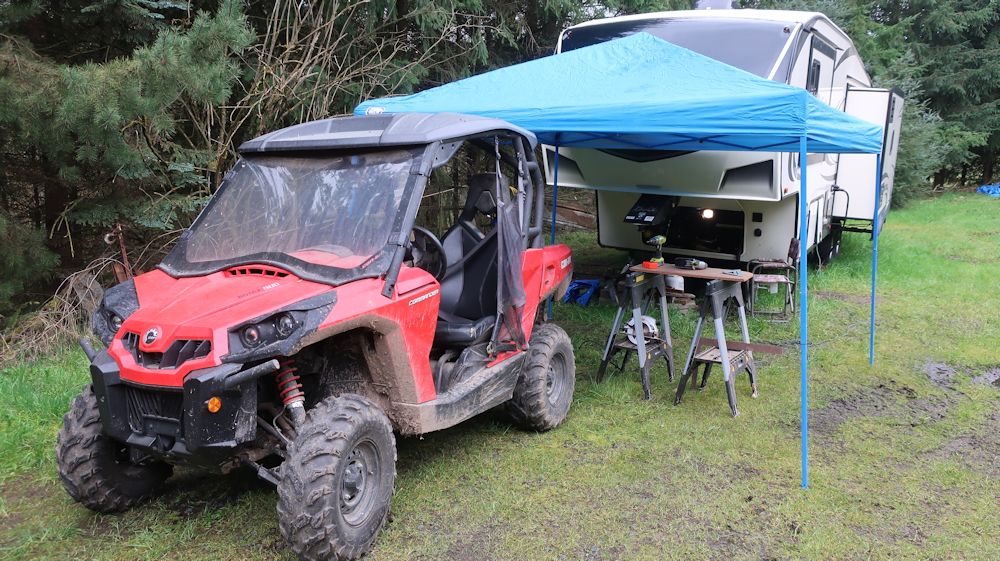
Fun project. It was done on some dry days and rainy days where I set up a place to work. And no...this isn't my tow vehicle.
-----------------------------------------------------