The biggest project going on now at our place, is working on and improving the home brewery. I need to get a stainless steel sink and some countertop installed, then we'll be working on a fermentation and supply room. The barn is not insulated or heated, so we bring the beer down to the house to ferment. I have a 7x8 foot framed section with a roof in the brew area that I'm going to floor, insulate, install a heater and put a door in to seal it from cold, drafts, mice and other critters that could get into things. When complete, I'll be able to store my grain safely, have all the equipment up there, (my wife will like that) and just fill a keg to bring down to the refrigerator in the garage. The storage & fermentation room is done! go to the "brewery photos" page, and scroll down to find a link to see some pictures.
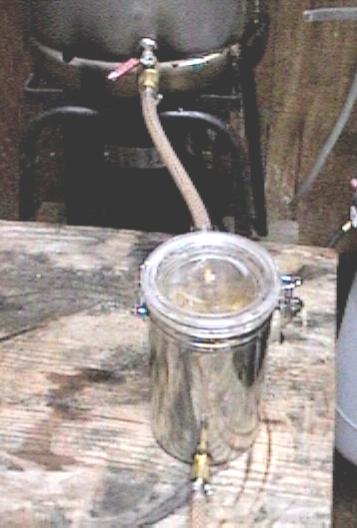
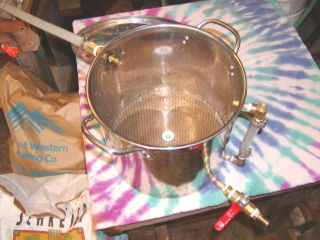
A couple of my latest projects have been a Hop Back and a H.E.R.M.S (heat exchange recirculating mash system) The hop back was made with ideas from an article by Thom Cannell in the October 2001 issue of Brew Your Own magazine. I happened to find the same S.S. container that he used for this project. What I did different, was to find a small stainless steel mesh colander, remove the plastic frame, and use it as a drop in screen above the bottom exit drain. The fittings are sealed with O rings and have 3/8" barb fittings to hook into my kettle and wort chiller.
A close up of the hop back with the cover off,
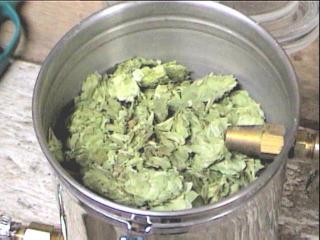
showing the inlet
and hops.
The HERMS system that I use has been a great addition to my brewing, as I used to have to apply a low heat to the mash and stir constantly, (the part I hated the most) to raise the temperature up to 170 degrees for mash off, prior to beginning the sparge. I do batch sparging quite often these days, as it shortens up my brew day. The HERMS is still utilized with this mash method to re-circulate and clarify the wort however. It is invaluable in a step mash also. The HERMS was not difficult to make, as I bought a fifty foot coil and gently pulled it into a tighter loop, so it would drop into the hot liquor-sparge tank. A couple of copper fittings were soldered onto the ends with 1/2" barbed fittings screwed onto those, and it was finished! The other part of this system is the pump, of course. It a march brew pump capable of handling liquid at 250 degrees.
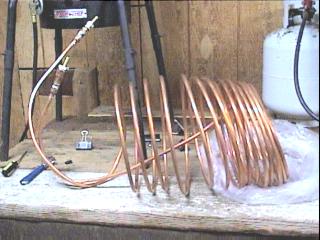
 As
you can see, there is not much to it. I pump the wort into the side of the
tubing that goes straight down to the bottom, then it circulates and heats from
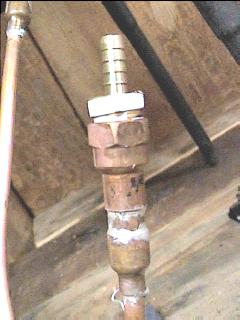
the bottom up, to the outlet. On the right is a photo of the adaptor to a
3/8" barb fitting. It is made with an adaptor to fit the 3/8"
copper tubing and sizes up to 1/2" threaded copper pipe. Fairly
simple, if you plan on making one, just start with the tubing and start putting
what will match up to your system and solder it up! Just be sure to use a
good silver solder, you cannot use one that contains LEAD!
As
you can see, there is not much to it. I pump the wort into the side of the
tubing that goes straight down to the bottom, then it circulates and heats from
the bottom up, to the outlet. On the right is a photo of the adaptor to a
3/8" barb fitting. It is made with an adaptor to fit the 3/8"
copper tubing and sizes up to 1/2" threaded copper pipe. Fairly
simple, if you plan on making one, just start with the tubing and start putting
what will match up to your system and solder it up! Just be sure to use a
good silver solder, you cannot use one that contains LEAD!
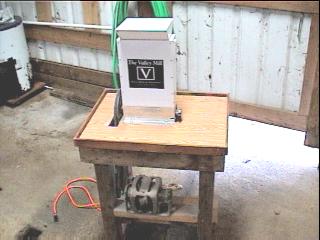
The Valley Mill powered by an electric motor, on a home built table. This machine will crush alot of grain in no time at all!
Another project of mine is my malt mill. This is a Valley Mill, made in Canada. I was looking for a quality mill that I could mount on a table and drive with a motor. The two I considered where the Valley mill and the JSP mill. I have seen both of these used in two of the homebrew supply shops where I buy beer supplies. I chose the Valley mill as it is reasonably priced, has adjustable rollers and has a grain hopper that holds about 8 lbs of grain at a time. Unfortunately the Valley Mill is no longer available and the company has gone out of business.
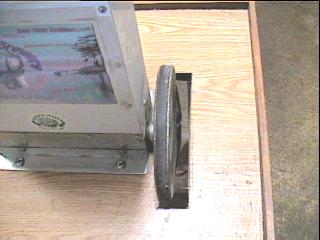
The table was done with 4x4 legs and 5/8" plywood covered with wood tone wall paper. I cut the pulley area extra wide for ease of replacing a belt in the future. Close attention should be paid to lining up the pulley on the mill, to the pulley on the motor below, if you plan on building one of these.
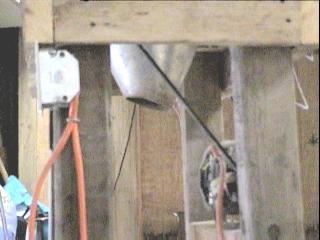
I used a sheet metal vent cap for roofing, and turned it upside down for an outlet funnel. This makes it handy for setting a grocery bag or bucket underneath to collect the crushed grain. The motor is mounted on a 2x4 cross piece and the tension for the belt was figured to be just right when the motor was screwed down tight to the cross member. An electrical switch mounted facing the front completes the project.
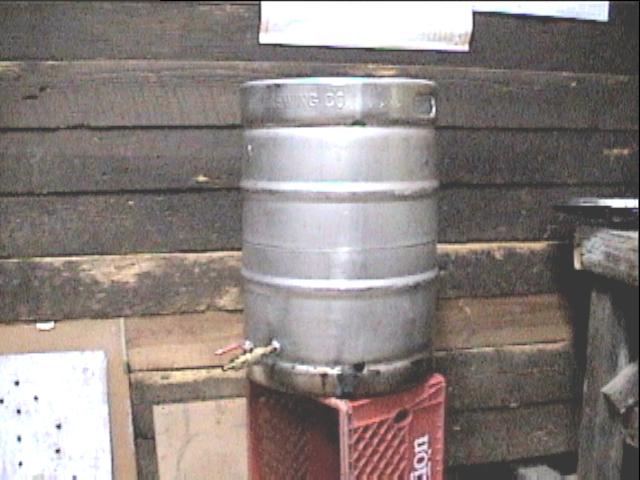
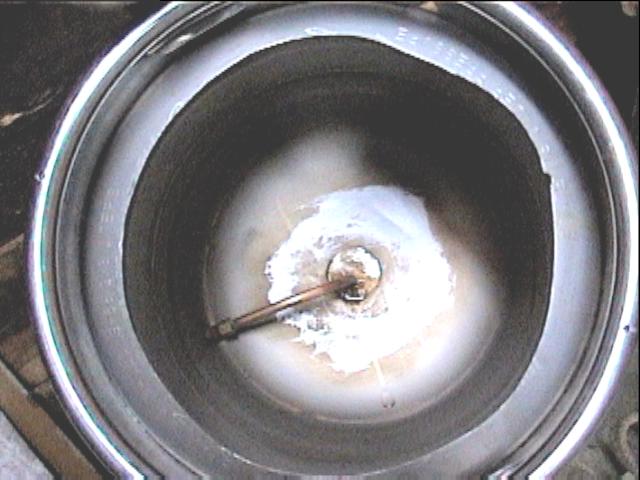
My converted beer keg with a bottom drain wielded in. It also has a copper dip tube that will pick up fluid at the very bottom. You can see this in the photo below.
Another task in converting my 15 gallon keg brew kettles, is to cut an opening at the top. I use abrasive cutting disks with a 4 1/2" angle grinder to do the cutting. To have a plasma cutter to do the job, would be even better.
The hop back is an essential piece of equipment in the brewery, as I like to make "Hoppy" American style ales. My newest hop back is a much larger version, to accommodate larger brews. The small one above is fine for five and ten gallon brews, but it is a little small for fifteen gallon batches, especially when I'm using six ounces of hops for an IPA. This is a six quart kettle and just happened to be a perfect fit for the 10" Stainless steel screen used in converted beer kegs for mashing. I brazed all the fittings to the kettle and you'll notice that I also added a sight tube to it as well. The nipples are all 1/4" NPT. The sight tube is 3/8" reinforced vinyl tubing mounted on barb fittings. This kettle was purchased in a set of three at Wal-Mart for around $20.00 so it is fairly inexpensive to build.
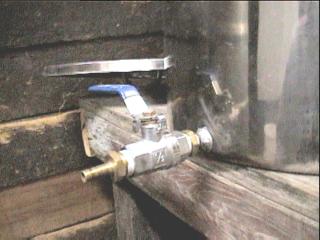
All my kettles are fitted with bottom drains. I use short pieces of 1/4" threaded pipe and braze them into the kettles. Then I use adaptors into 1/2" ball valves and finish with 3/8" or 1/2" hose barb fittings. You can silver solder with a propane torch but it can be tricky to make a good wield . Always use a food grade silver solder or brazing rod such as safety silv56.
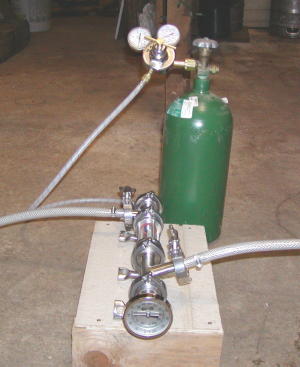
This is my oxygenator assembly. I inject pure oxygen at the rate of 3 to 5 psi into the wort stream. It has a S.S. sintered diffusion stone and sight glass. I have 1/2" hose barb x 1 1/2" TC sanitary fittings, to the inlet and outlet of the assembly. Although not home built, it did require the addition of a check valve to prevent flow back into the air line, and some figuring and fittings from the oxygen tank to the oxygenator.
The Mash-Hop Screen. Here is just the thing for your boil kettle or
mash tun. Designed with the "keg to kettle" in mind.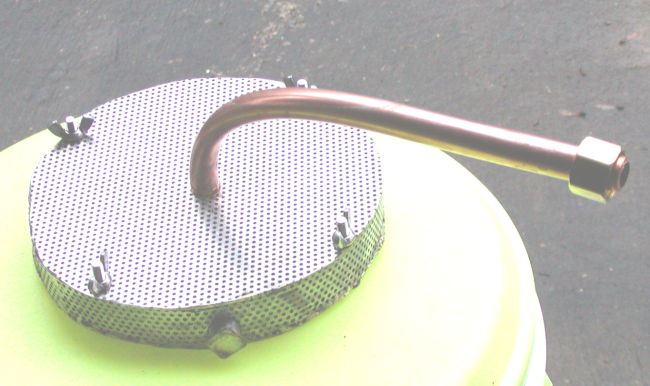 Check out more detail here: Mash-Hop
Hop Growing at Deer Island /
Brewery Photos /
News & Events
Favorite Brew Pubs
/ More Great Beer Sites
![]()
 HOME
HOME